The wires on the tabletop on the right side proved harder to draw than I’d originally thought. I knew that the spaces between them would look smaller as they receded to the back, and that the wires themselves would appear thinner, but this was surprisingly hard to draw. I decided to construct the effect using perspective.

Well, here’s how to do it! Below, I first drew the rectangle they would occupy, in perspective, by tracing it from my drawing. I found from trial-and-error, that this actual rectangle would yield divisions that were too small, so I extended it to be a few inches longer. Then, to find the center of this rectangle, I drew straight lines from corner to corner. Where they intersected, I drew a line parallel to the picture plane. This is the halfway mark.

I repeated this process, finding the center of the two rectangles I’d created above and drew two more lines parallel to the picture plane. These are marked in below as 1/4 of the length of my original rectangle.
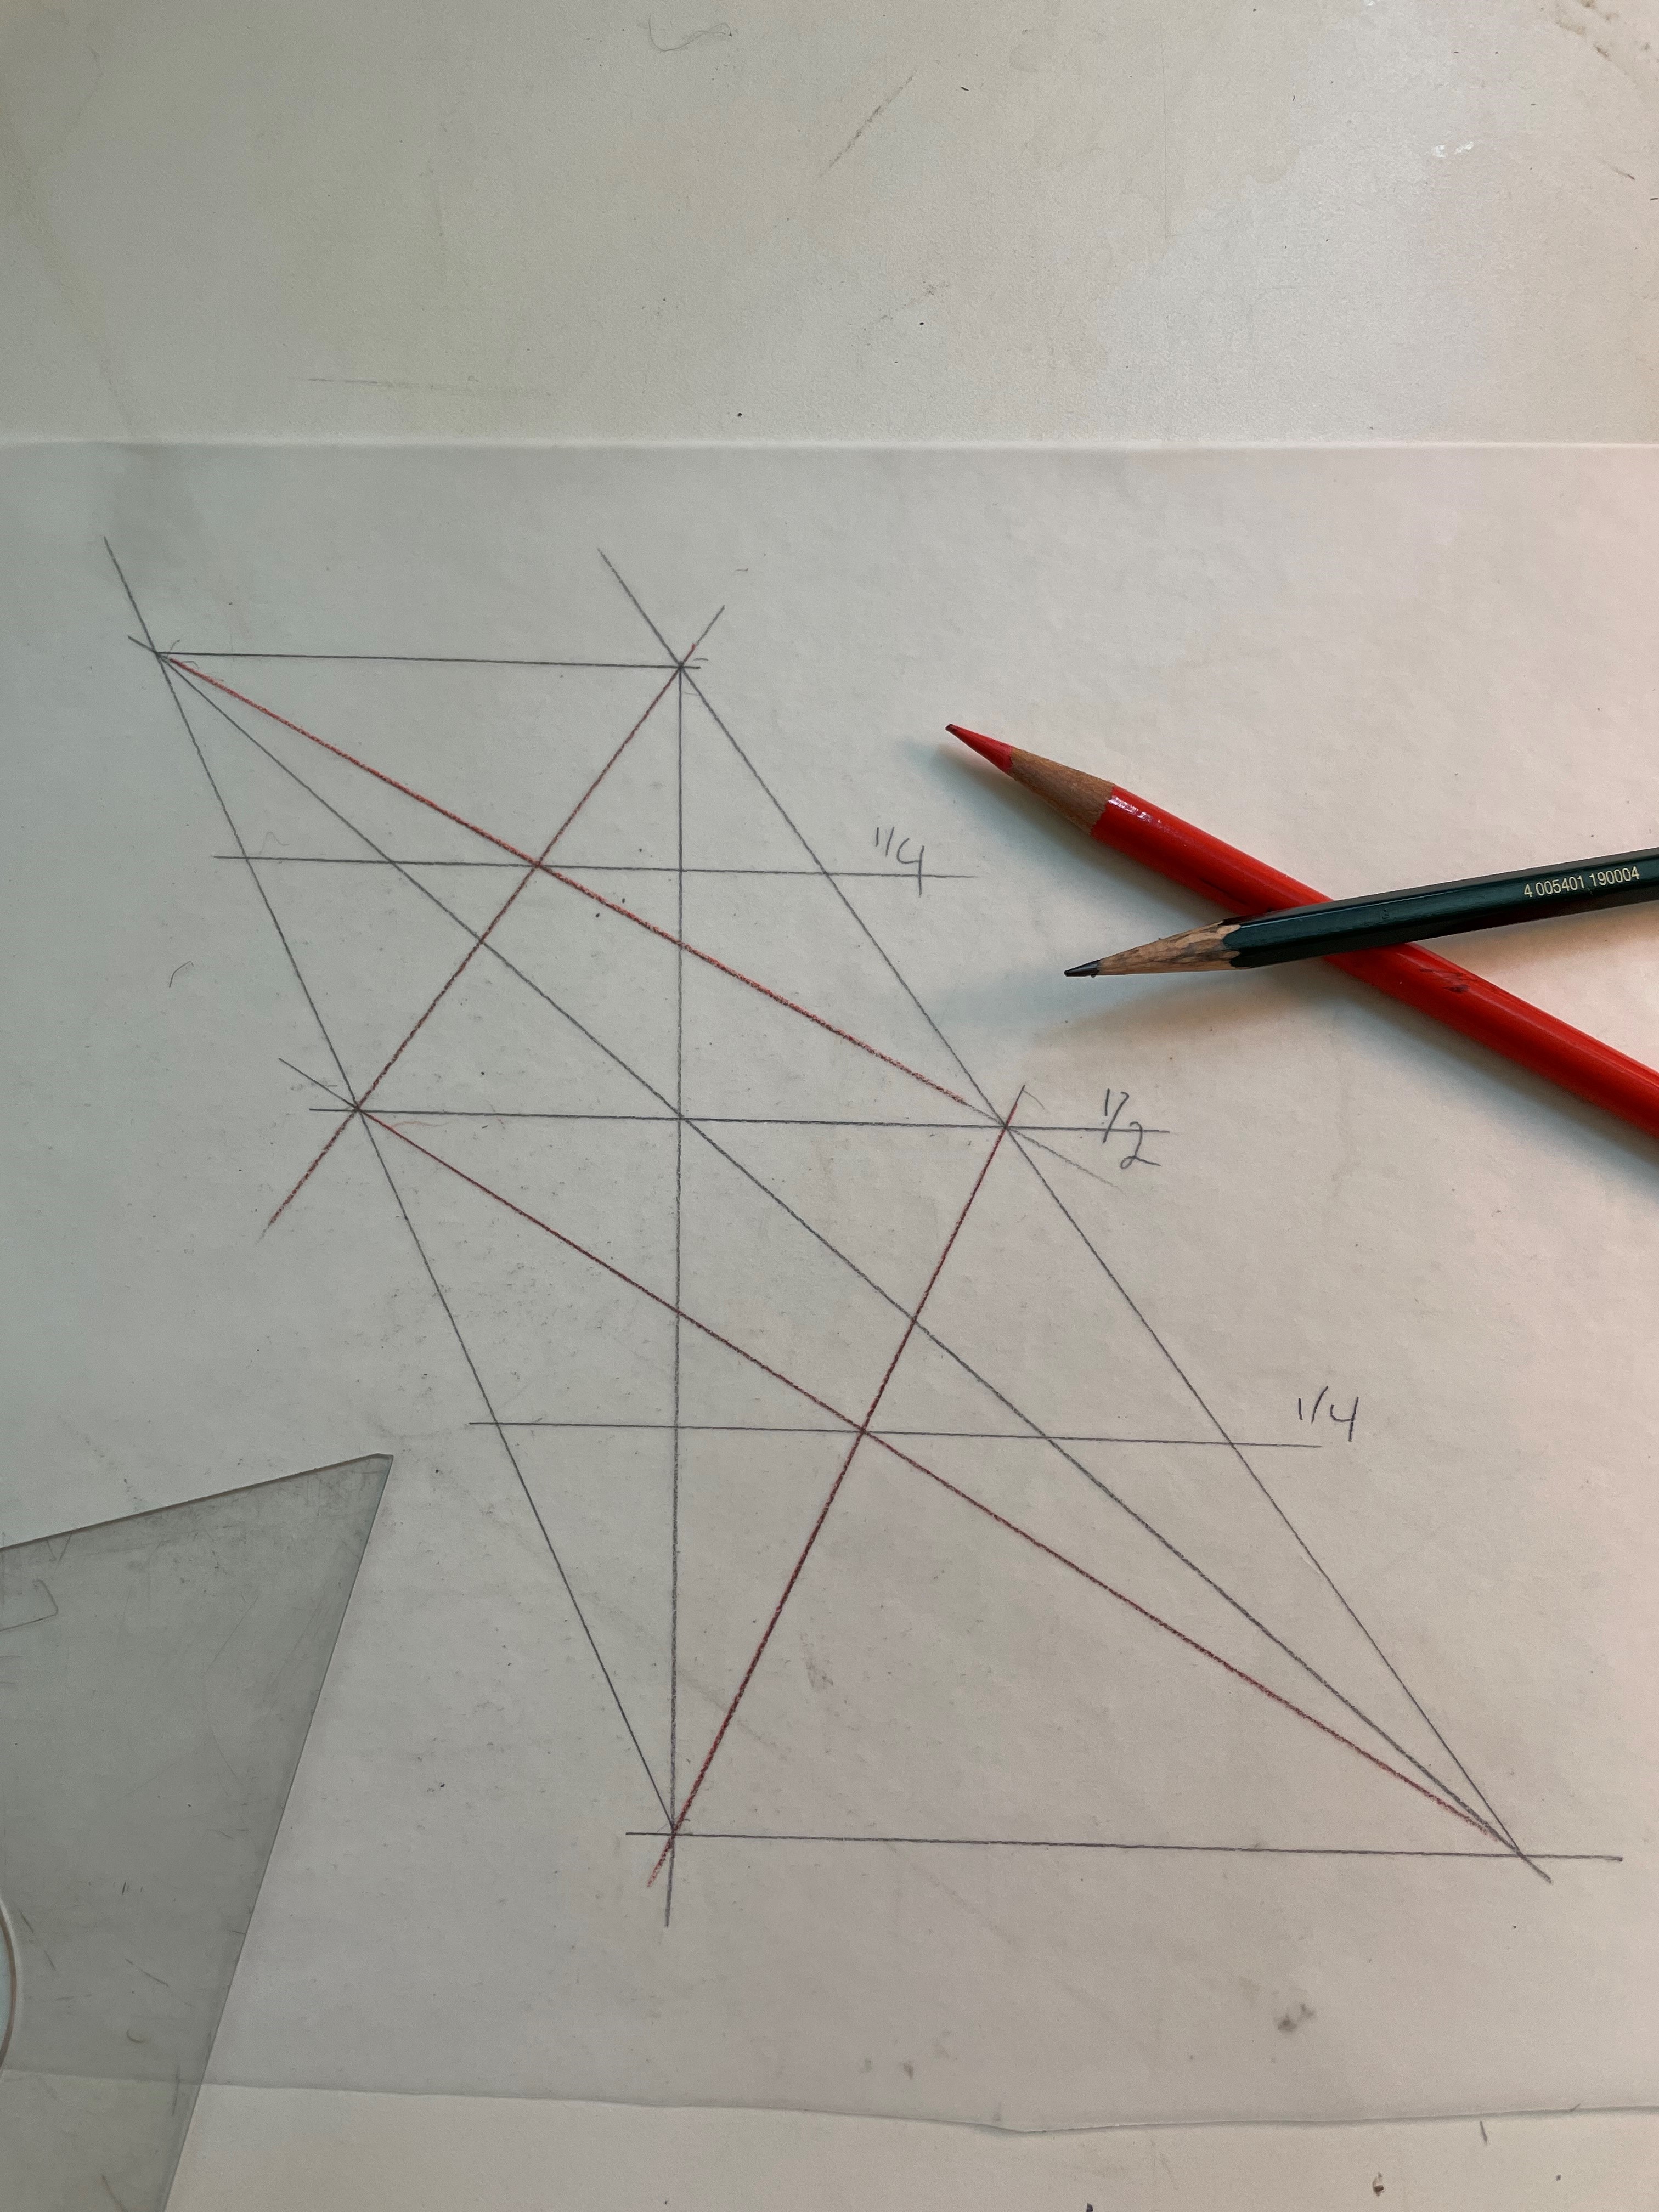
I divided my rectangles in half again, to get 8 rectangles. You can see these below in blue.

Finally, I divided these 8 rectangles in half again to get 16. I only needed 11 rectangles, so I chose the ones that seemed about the right distance apart. These ended up being the top 11.

I transferred these markings to my drawing. I used the tracing paper as transfer paper by rubbing graphite on the back side and tracing the lines onto my drawing.

Here they are, above.

Next, I drew in the thickness of the wires, making them get a bit smaller as they went back in space. It didn’t seem worth the time to try to construct these, so I did it by eye.

I know that the wires are just a small part of the composition, but I’m happy knowing that they are correctly drawn and will look right in the final painting.
