I’m happy with my study, and don’t need to move anything around on the drawing. Now I can go back and finalize the ellipses and correct the perspective.

Above, you can see all of the ellipses I drew and then transferred onto the drawing. You can see the construction lines and my notes on the right. 3@15, for example, means that the length of the ellipse (the major axis) is 3″ and it is 15 degrees below my eye level. To see more on how I construct an ellipse, see Portfolio and Jewelry: Drawing.
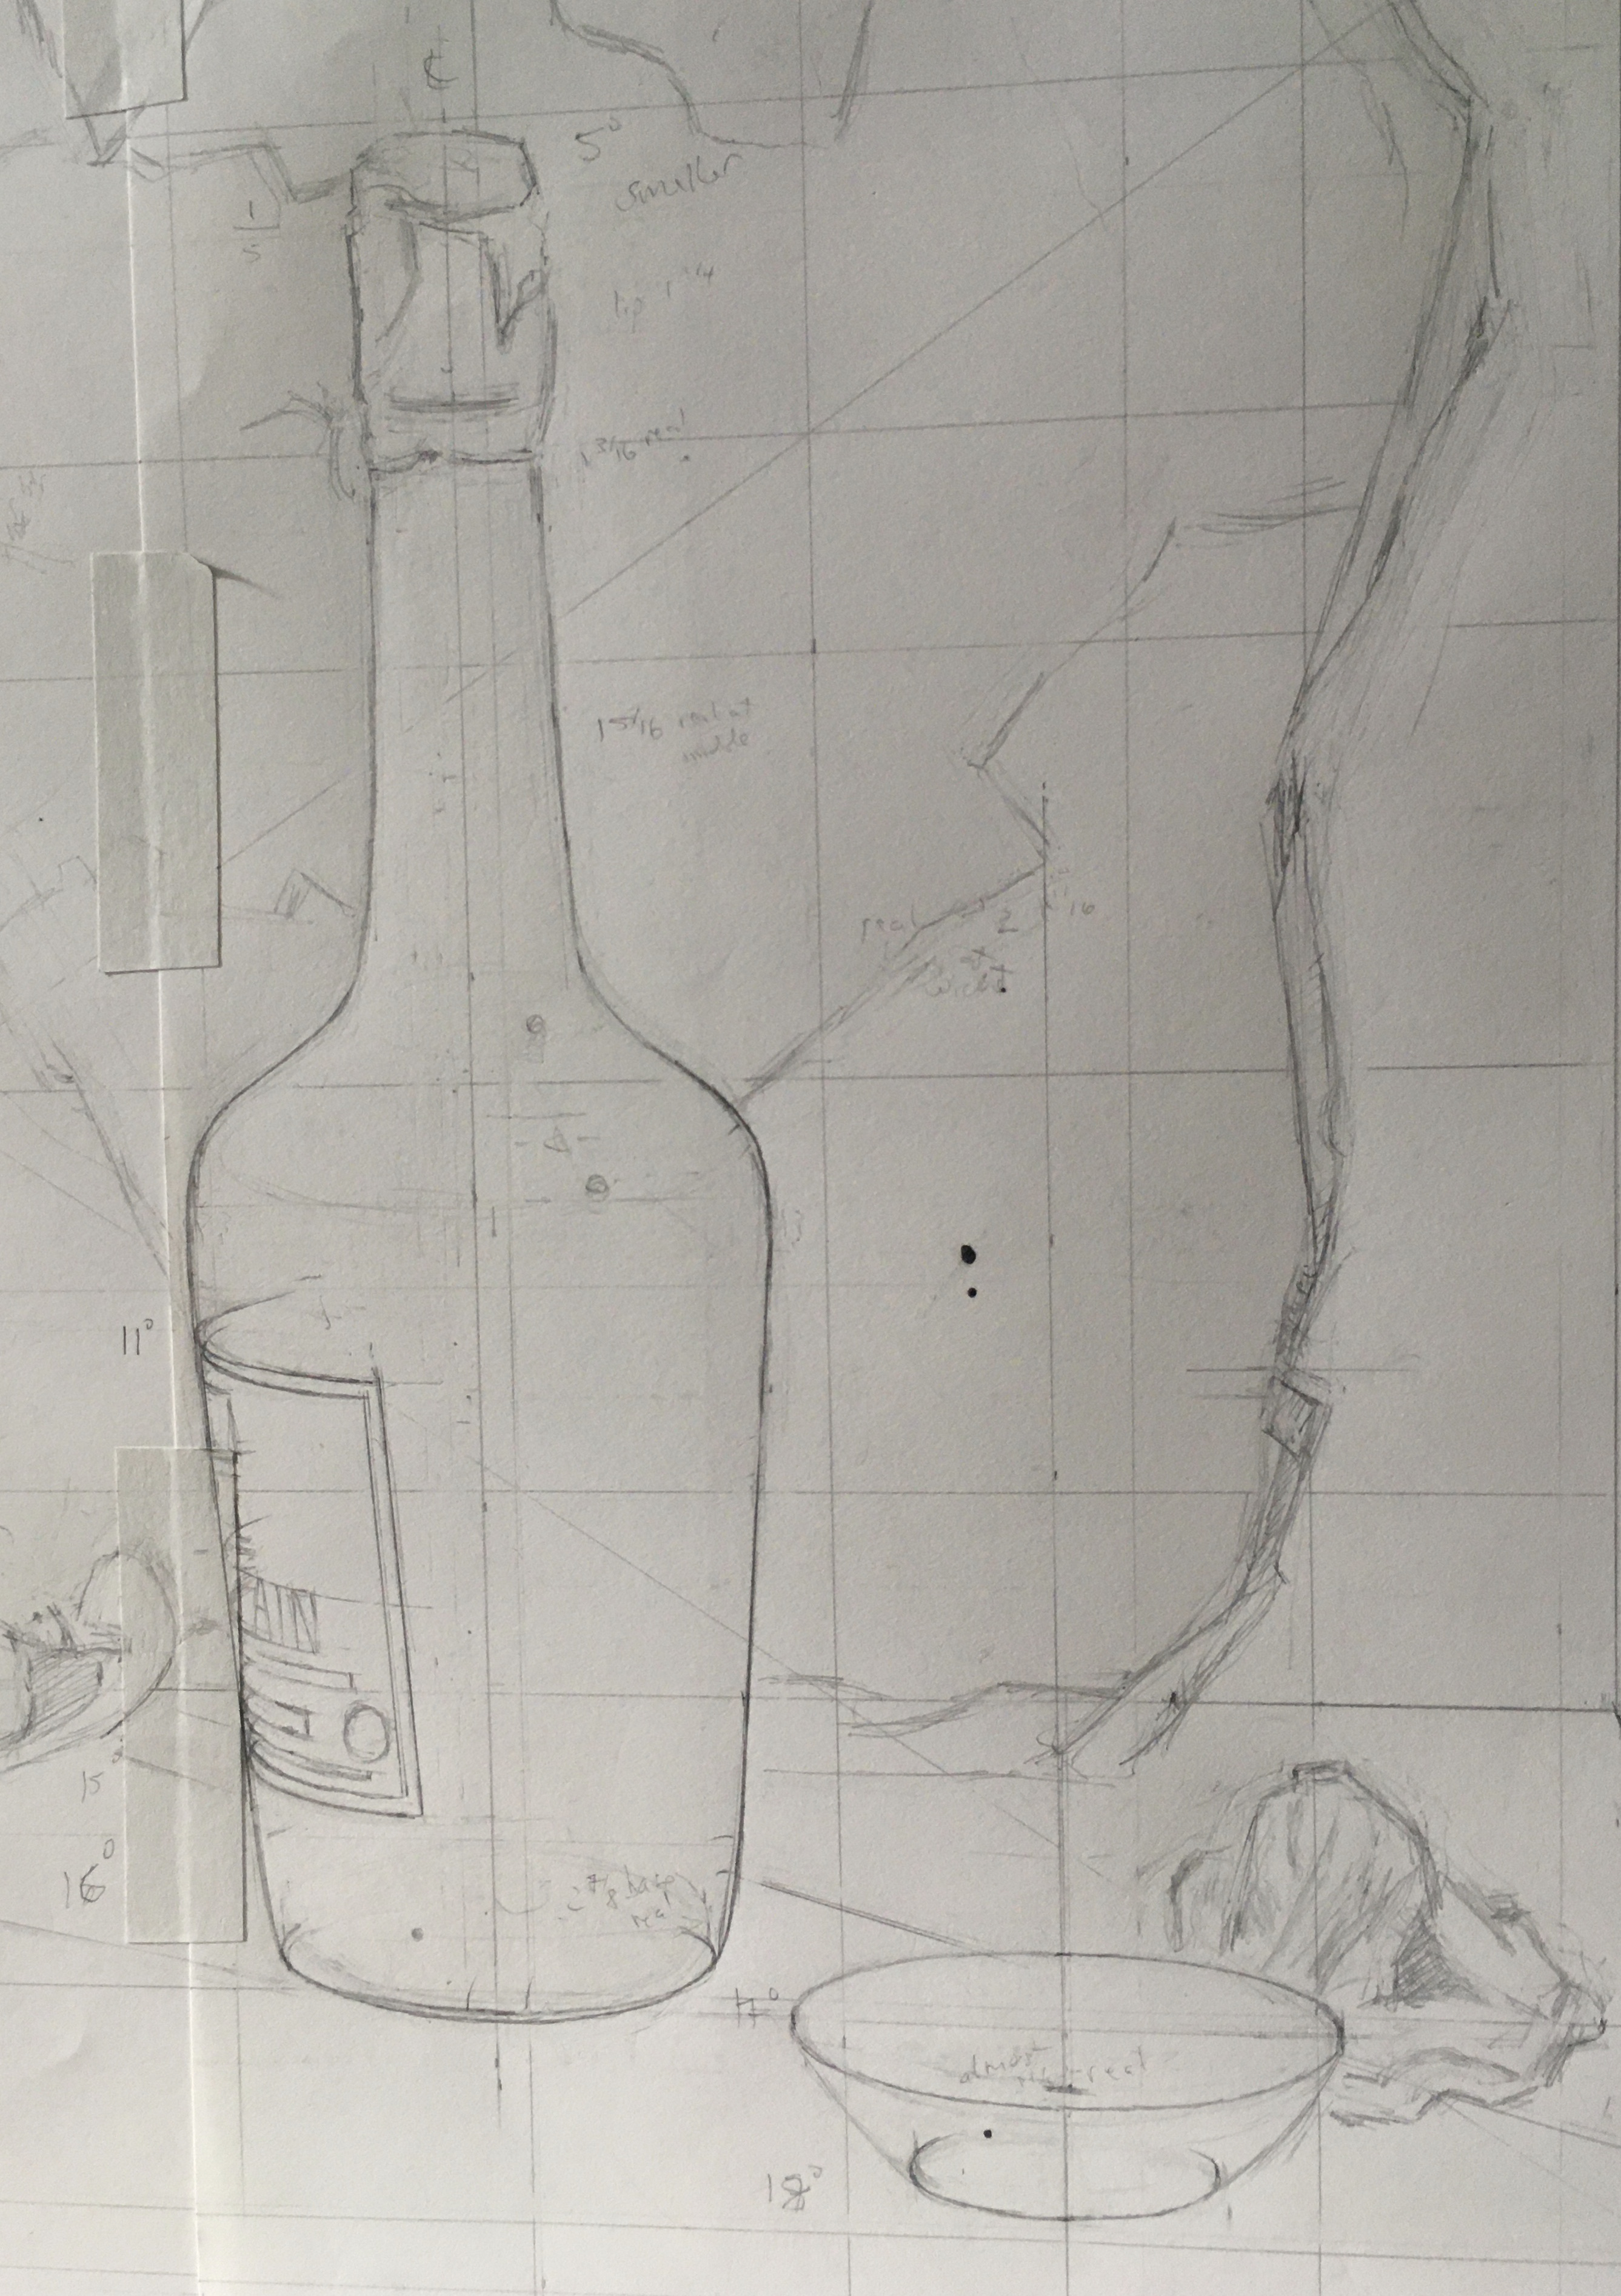
Above, I’ve transferred the ellipses to the drawing, using tracing paper rubbed on the back with graphite. Sometimes, even after all of the measuring, the ellipse looks wrong to me! I always believe my eyes, not the measurements. I adjusted the ellipse at the bottom of the bottle. It looked too shallow, so I deepened it. You can see both lines. I marked the shallow one with a tic-mark to remind me. It was easier than trying to erase.
I checked that the bottle was symmetrical by tracing the side I was most confident in. I included the vertical center line in my tracing. I then flipped the tracing over, lined up the center line, and traced the original line onto the other side. Amazingly, both lines matched up.
I took a little time indicating where the text would go on the label. This was probably wasted effort, as I like to paint in the whole label, getting the value transitions and colors right before painting the text. Because of this, all of my drawing would be covered up with opaque paint! Oh, well!
My canvas should arrive this week from my canvas guy, and I can finally begin to paint!
