
Here’s my palette. It’s an antique inherited from my husband’s artist uncle. I’ve added my own patina after 26 years! It is weighted perfectly. I don’t think I could paint with a different one!
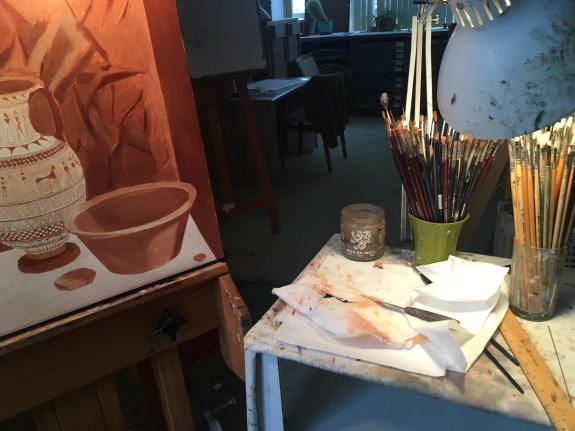
Here’s my rolling painting table, also with a patina! I have one jar for my hog bristle brushes and another for my sables. A jar for my mineral spirits, my palette knife, and a lot of paper towels complete the set-up.

I put in a dark glaze on both sides. Usually, I’d do several layers of glaze, wiping each one with a cotton pad, and letting each layer dry for a day. Here, I’m experimenting with not wiping with the cloth, and instead, tamping the wet glaze with a domed shaving brush. This leaves a slightly stippled texture and doesn’t remove as much glaze.
I also glazed a few dark areas on the vase, and started to put some color on the stones on the left.
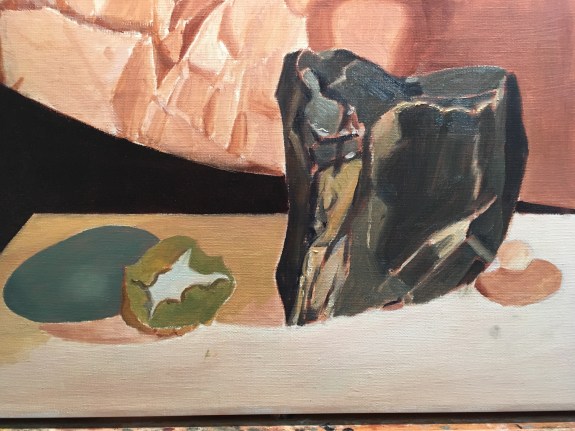
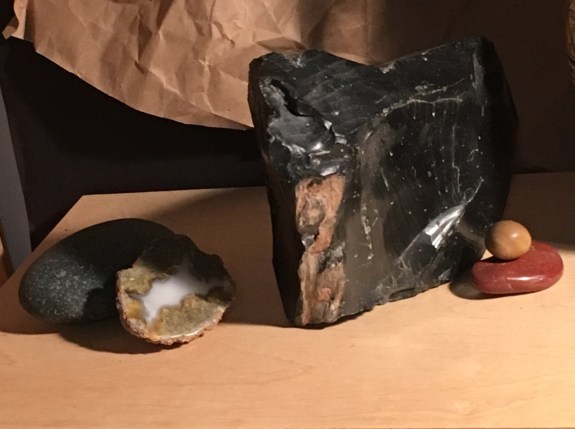
Above, you can compare reality to the painting (the camera angle’s a bit off). At first, I’m just putting down the approximate local colors. After this dries, I can correct by adding glazes for the shadows, lighter scumbles for the lights, and of course, details!
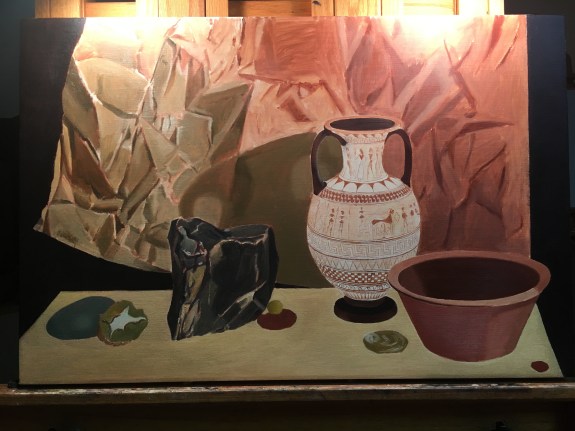
I’ve painted the table top, stones, and bowl. I’ve made a start on the paper background. I can see now that the color’s off. It’s too green. I’ll correct that at my next session.

I start roughly, just indicating the general shapes and values. Only once these are in place can I begin to see and paint the details.
